System Settings
The System Settings menu allows you to adjust options that effect the Cablecast system as a whole. This settings UI is broken out into headers with their respective settings beneath.
System Configuration
Locations
Locations allow your Cablecast system to perform complex automation involving multiple head ends. You could have one head end at City Hall and another on the other side of town. For example, Cablecast can be configured for network-style contribution routing allowing programs to originate from either Location and play on a single shared channel.
If you feel that additional Locations would be useful for your system, please contact our support department for more information.
To create a new Location:
- Click
New. - Click to edit the new Location.
- Enter a descriptive name for the new Location.
- Click
Save.
To delete a Location:
- Tick the box next to the Location that you would like to delete.
- Click .
- Click to confirm that you would like to delete the Location.
Channels
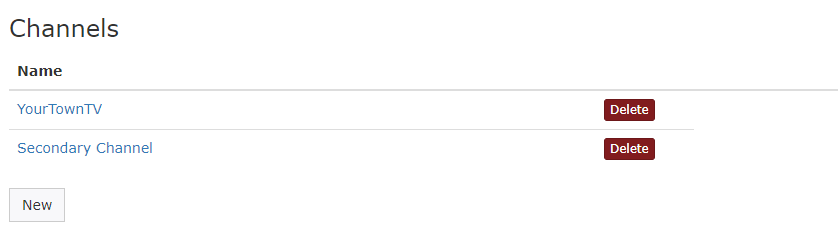
Each Channel in Cablecast represents an automation destination. Each Channel has its own independent schedule and settings.
To create a new Channel:
- Click
New. - Click on "New channel" in order to edit it.
- Click
Channel Details. - Enter a descriptive name for the new Channel.
- Click
Save.
To delete a Channel:
- Click
Deletenext to the Channel that you would like to delete. - Click to confirm that you would like to delete the Channel.
Clicking the name of a Channel will open the Channel settings screen.
Channel Details
- Channel Name: Sets the name that will be used for this Channel throughout Cablecast.
- Interstitial Length: Defines a minimum gap between programming on the Schedule. Setting this to will disable interstitial gaps and allow true back-to-back playback.
Channel I/O
- Location: Sets the Location that produces the final channel output. If there is only one Location defined, this setting is disabled.
- Output: Sets the routing switcher output that is used as the final channel output. For more information on outputs see [Outputs](#sec: UiReference: Settings: LocationSettings: IOTab: Outputs).
DSK
- Show Bug Graphic: Determines when the Channel's bug will be active. Choose from: Always, Never or During Run.
Channel Languages
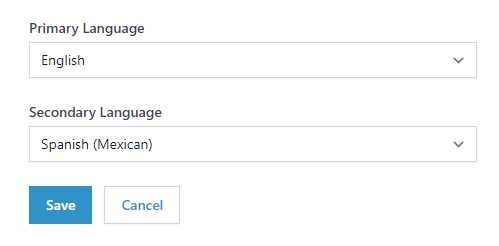
The Primary Language and Secondary Language settings determine which caption languages will be displayed in the CC1 and CC3 area of the SDI (i.e. Channel) and the Live Stream outputs. If a show is being played out and has captions matching the chosen languages the caption data will be sent, otherwise nothing will be displayed. If you are not doing translations the Secondary Language can be set to None. Most users will set the Primary Language to English and the Secondary Language to None or the language that is typically translated.
Note: Only the 7 supported broadcast caption languages are available in these settings.
Servers
The upper most section of this UI shows the configured servers as part of your Cablecast eco-system. This includes things like automation systems, video on demand systems, livestreamers and other Cablecast family hardware.
To create a new Server:
- Click
New. - Enter a descriptive name for the Server in the field.
- Enter the IP Address or DNS Hostname of the Server in the field.
- Click
OKto create the new server.
To edit a Server:
-
Click
Editfor the Server that you would like to edit. -
Update the desired field(s):
- Name: A name for the server
- Host Address: The IP address of this server on your network.
If the server is a model that supports video or CG playback you will have the following settings available for the Cablecast CG background audio:
- Audio Device: Choose any available line-in audio device on the server to be used for background audio.
- Volume Adjustment: Enter an amount of audio adjustment applied to the playing of background audio.
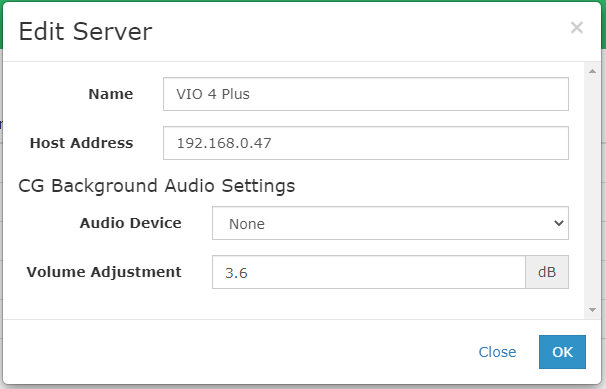
- Click
OKto commit the changes.
To delete a Server:
- Tick the box next to the Server(s) that you which to delete.
- Click
Delete. - Click to confirm.
Once Cablecast connects to a Server it will populate the remaining fields in the table. The displayed fields are:
- Name: The user-defined name of the Server. This value will be displayed throughout Cablecast.
- Host Address: The IP Address or DNS Hostname of the Server.
- Connection: Indicates the real-time status of the connection to the Server.
- RAID: Indicates the current status of any RAID storage volumes on the Server. This data is updated every few minutes.
- Volumes: Indicates the current status of free space on the Server's storage volumes.
- Last Update: Shows the time at which the system last updated information about this Server.
- Version: Shows the version of Cablecast that is installed on the Server.
- Time Difference: Shows the offset between the clock of the Server and the main Cablecast Server.
- Remote Access: Provides the remote access code that Cablecast tech support staff will need in order to connect to this server for troubleshooting.
- Edit: Click to update the details of the Server.
File Stores
File Stores are used to define different areas within your systems to store files. Files can include things such as video files for show records, video on demand content, recordings (encodes), and more. Additional File Store definitions can be configured within File Stores of a device.
There are two different Types of File Stores:
- Cablecast Server: A File Store on one of the Cablecast servers in your Cablecast network.
- Local Network: A path to a directory somewhere on your local system. This doesn't have to be a Cablecast device.
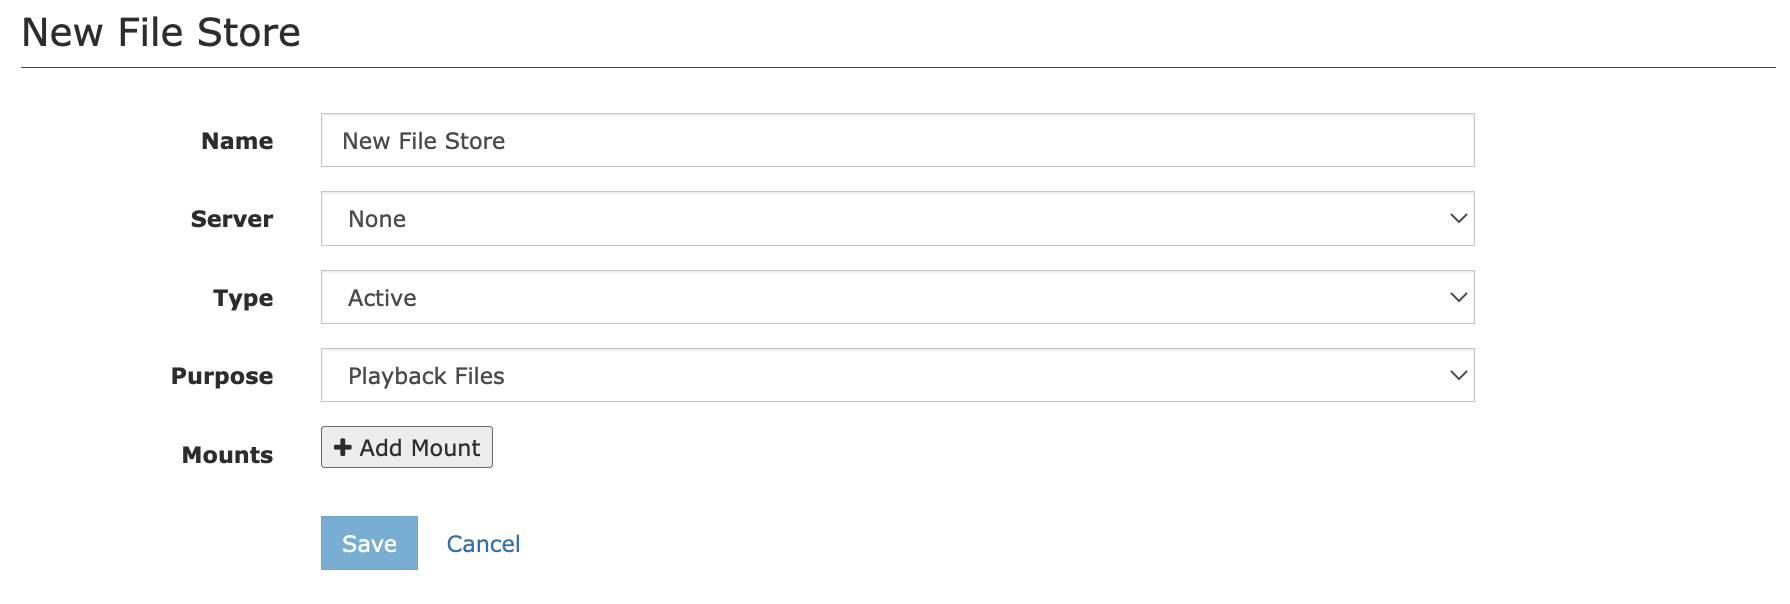
To create a new File Store:
- Click
Newunder the File Stores section. - Define a "Name" for this File Store.
- If the File Store is located on a Cablecast Server, select the appropriate Server name from the dropdown.
- This cannot be changed after a File Store is created.
- Select the "Type" of File Store
- Active: Actively houses content that will be used for playback.
- Backup & Archive: Only used for the purposes of backing up and archiving of content.
- Select a "Purpose".
- Playback Files: The File Store contains video files and/or additional playback content.
- VODs: The File Store contains exclusively Video on Demand content.
- Create/Add at least one Mount for this File Store. Mounts are file locations on the server that will be used for the File Store.
- Local: Full directory paths on the system, i.e.
C:\vod - UNC: Shared network locations, i.e.
\\video-share\content
- Local: Full directory paths on the system, i.e.
- Click
Saveto save and create the File Store.
For example, let's say we want to create a File Store on our system called "Meetings". Lets assume our main Cablecast Server is called "Primary System" and the meetings folder is a sub-folder within the content drive.
- Create new File Store.
- Name the File Store "Meetings".
- Select the server "Primary System".
- Create a Local Mount with Path
E:\meetings. - Click
OKto save. - Finally, navigate to the File Stores of the device and select "Meetings" to allow playback on the Primary Server.
Integrations
Integrations provide Cablecast a way to communicate with outside products and services while incorporating some or all of their features into the Cablecast UI.

To create a new Integration:
- Click
Newunder theIntegrationssection. - Define a "Name" for this Integration.
- Select the "Integration Type" from the dropdown.
- Currently only Agenda Link is supported.
- Complete the form based on the type of Integration.
- Agenda Link
- Agenda Link Client ID: Client ID for your Agenda Link account.
- Agenda Link API Key: API Key for your Agenda Link account.
- Public Site: Select which Cablecast Public Site to display the Agenda Link Integration on.
- Agenda Link
- Click
Saveto create the Integration.
Agenda Link
Agenda Link is a "meeting management tool which allows users to create clear agendas, optimize time spent in meetings, and determine next steps." The Agenda Link Cablecast Integration allows for Shows and their VODs to be synced with Agenda Link. VOD Chapters can be generated from an Agenda Link Meeting and updated as needed from the Cablecast UI. The Cablecast Public Site can also display an embedded link to a Show's associated Agenda Link Meeting.
To make use of the Agenda Link Integration, a few steps are required:
- Create an Agenda Link Integration (see Integrations).
- Create a Custom Field of "Type"
Agenda Link Meeting(see Custom Fields). - Sync a Show with an Agenda Link Meeting.
- Navigate to the Show Page.
- The
Agenda Link MeetingCustom Field should be displayed under theBibliographic Infosection. - Choose
Select Meeting - Search for and select an Agenda Link Meeting.
- Save the Show.
- Sync VOD Chapters with an Agenda Link Meeting.
- Navigate to the VOD Page.
- In the
Chapterstab, press thePull Chapters From Agenda Linkbutton. This will populate the VOD Chapters with information from the associated Agenda Link Meeting. - The position visibility of these Chapters can be edited.
- Choose
Push Chapters To Agenda Linkto sync the edited Chapters with the Agenda Link Meeting.
- Display the Agenda Link Meeting on a Cablecast Public Site
- Navigate to the Cablecast Public Site Page.
- In the
Show Fieldstab chooseAdd Fieldto add a new Field Display.- Give the Field Display a "Label".
- The "Field" should be
Custom Field. - Select the Agenda Link Meeting Custom Field created earlier from the "Custom Field" dropdown.
- The "Display" should be
Embedded IFrame.
- Save the Internet Channel.
Multiple Audio Programs
The Multiple Audio Programs configuration screen allows you to set the global option for allowing a Multiple Audio Program to function in Cablecast. Enabling MAP here will allow Shows and VODs with multiple audio sources to be played and transcoded with a secondary audio source. For automated playback files with more than one audio program, it will play the first two audio programs. This setting can be overwritten by each individual Reel or VOD.
Network Configuration
Public Connectivity
This screen is where you define a hostname for the system, as well as configuring SSL settings and reviewing status.

The following hostname information is available:
- Hostname - Define the system hostname
- HTTP Port - Define the HTTP port for the management UI. (Default: 80) If using SSL, you must use port 80.
- Frame Ancestors - A comma separated list of external sites where Cablecast can be embedded.

SSL (Secure Sockets Layer) is a protocol for establishing authenticated and encrypted links between networked computers. An SSL certificate also includes identifying information about a website, including its domain name. The following SSL settings are available to you:
- Enable SSL - Enabled/disabled if the system should use SSL.
- Use Let's Encrypt - Enabled/disabled if the system should use Lets Encrypt for free / automatic SSL certificates. If you do not use Lets Encrypt, you'll be shown a file path where you should put your certificate file(s). This is typically in the
C:\TRMS\Certificates\directory. - Challenge Type - If using Let's Encrypt, this setting allows choosing either
HTTP-01orDNS-01challenge type.HTTP-01- This challenge requires opening port 80. No other configuration is necessary.DNS-01- If it is not possible to expose port 80 to the Internet aDNS-01challenge can be used. This challenge requires making changes to your DNS records. ACNAMErecord will need to be added to the DNS configuration with a._acme-challengesubdomain of the main domain. The value of theCNAMErecord should contain the record name with.cablecast.netappended to the end.
For example: A customer with the domaincablecast.portlandmedia.orgshould create aCNAMErecord with_acme-challenge.cablecast.portlandmedia.organd set the value to_acme-challenge.cablecast.portlandmedia.org.cablecast.net.
- Additional Domains - If you have additional domains that point to your system, provide a comma separated list here.
- Notification Email Address - Optional contact email address (if using Lets Encrypt).

The current "SSL Certificate" details are visible:
- Status: Will show if the current configured SSL certificate is valid, or otherwise.
- Last Checked for Renewal: The last date/time the SSL certificate was checked.
Time Syncing
This screen controls how often Cablecast sets the time on each of the configured Servers.
Closed Captioning
Languages
Languages screen allows for the configuration of which languages will be displayed in areas of the UI where Closed Caption and Translation languages can be selected. The user can limit the list to a smaller subset of languages that may be appropriate for their facility.
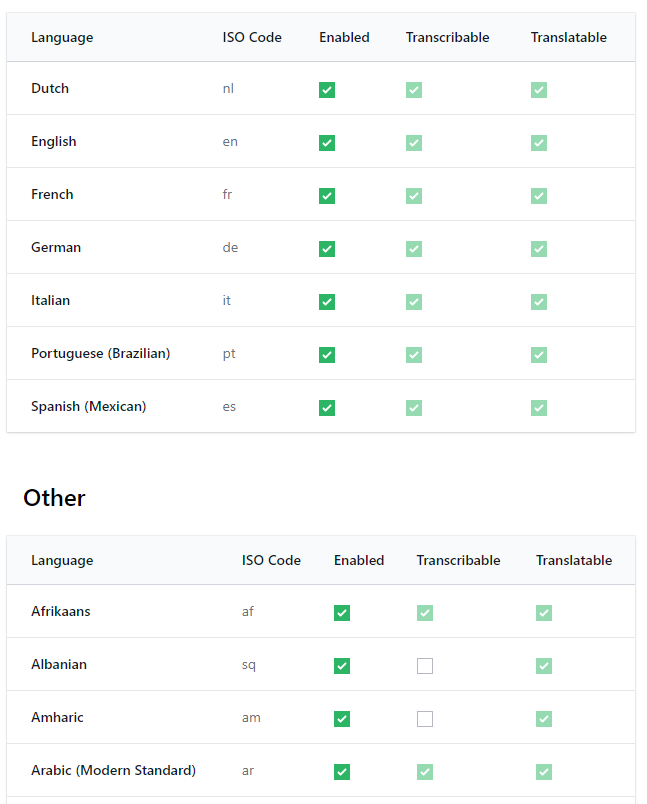
The Enabled checkbox allows you to select whether that language will be displayed in dropdown lists for the selection of languages in other areas of Cablecast.
The list is divided into two sections. The top section lists the 7 languages that are supported for display of captions on the SDI (i.e. channel) and Live Stream outputs. The languages below that listed under Other are additional languages that are supported with Video On Demand playback.
The right two columns in the table show the features that are available for each language.
- Transcribable - This language can be transcribed by Cablecast. Shows recorded with audio in this language can have captions generated in that language.
- Translatable - Cablecast can translate existing captions into this language.
Once the languages to enable and disable are selected, hit the Save button at the bottom of the screen.
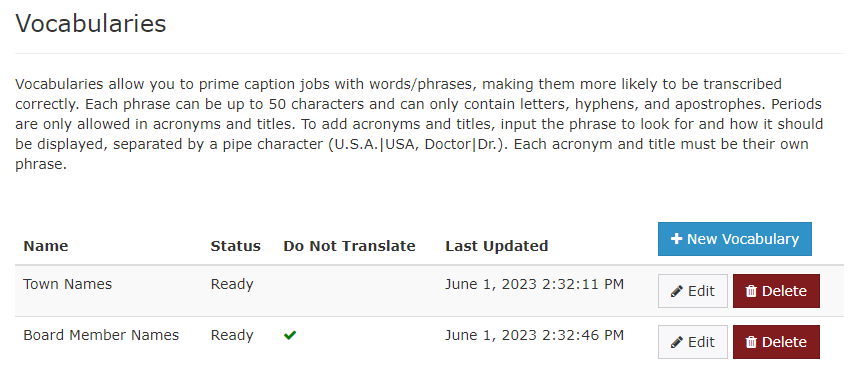
Vocabularies
Vocabularies allow you to prime caption jobs with words/phrases, making them more likely to be transcribed correctly.
To create a new Vocabulary:
- Click
+ New Vocabulary - Give the Vocabulary a descriptive name
- Define phrases by enter a phrase, followed by the enter key
- A single phrase cannot exceed 50 characters
- Phrases can only contain letters, hyphens, apostrophes, and periods.
- To add acronyms, input the phrase to look for, a pipe character, and how it should be displayed (ex.: U.S.A.|USA).
- Remove defined phrases by clicking the trash can icon to the right
- Click the Do Not Translate checkbox if the all of the words in this vocabulary should not be translated into other languages during any Cablecast Translation jobs. Proper names are a good example of words that shouldn't be translated. If you wish to have only select words not translated add these in the Do Not Translate setting
- Click
Save
Creating a Vocabulary will require some backend cloud processing, and will display "Ready" once its completed. A custom Vocabulary cannot be used until its status shows "Ready". If a status shows "Error", check your Vocabulary for errors, or reach out to support for assistance.
To delete a custom Vocabulary:
- Locate the Vocabulary you wish to delete.
- Click
Delete - Confirm the deletion of the Vocabulary
Do Not Translate
The Do Not Translate configuration screen allows you to add words or phrases that will be excluded from any Cablecast Translation jobs. This can be useful for proper nouns, such as the names of people or places, that should not be translated to the equivalent foreign word.
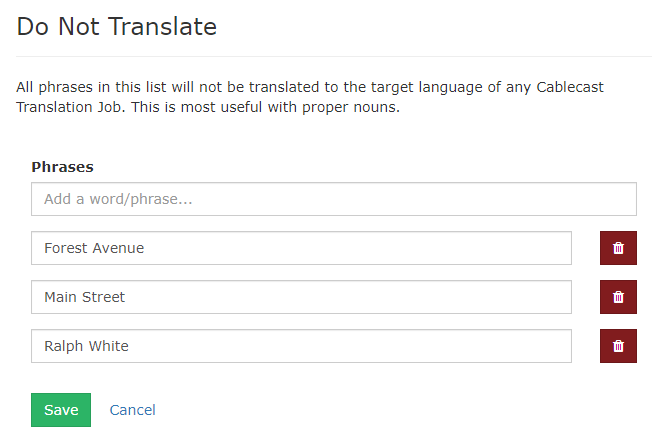
To add words or phrases to the Do Not Translate list, type them in Phrases box and hit the enter key.
To remove any existing entries, click the Trashcan button next to the item.
Click Save once you are done adding or removing items from the list.
Note: All the words in a Custom Vocabulary can also be excluded from translation. See Custom Vocabularies settings for details.
Data Backups
Database Backups
This screen allows you to configure automatic database backups. In the event of a hardware failure or accidental data loss, these backups provide a possible means of data recovery. There is no charge for this service.
To enable automatic database backups:
- Tick "Backup my database".
- Enter the name of the person that is the main contact for your station in the field.
- Enter your station's name in the field.
- Enter your station's phone number in the field.
- Enter your station's ZIP code in the field.
- Click
Save
System Archives
This shows the last 7 system archive / backups of your different systems. A green check shows a successful archive backup was created, a red cross shows there was an error with the creation of the archive on that day. Archives are generally created late at night when system usage is lower.

Clicking on an archive will show:
- Location - The absolute path of that archive.
- Filesize - The file size of the archive on the disk.
- Created - The date & time the archive was created.
Software
Cloud Services
You can extend the functionality behind your Cablecast system by leveraging different services offered by "Cablecast Cloud Services". This settings screen will help you configure the connection, as well give you a status of each available service.
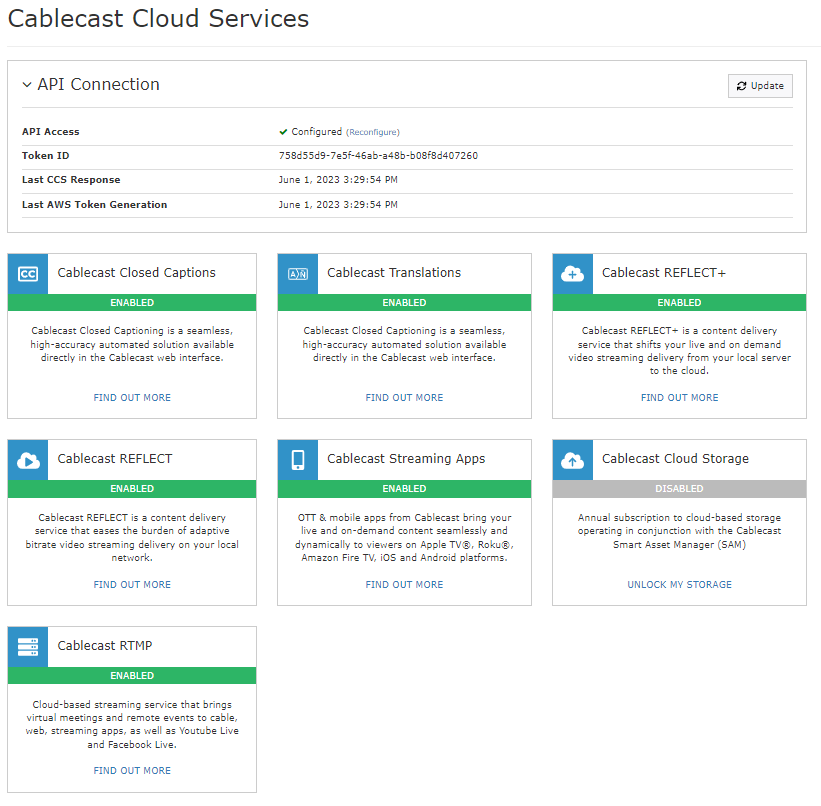
Within this section, you can setup the API connection for the first time, or manage new API Tokens between your server and cloud services. The current settings, if any, will be displayed:
- API Access: Will show unconfigured or configured, click "Reconfigure" to change token/secret.
- Token ID: The Token ID defined during setup. The secret cannot be viewed for security purposes.
- Last CCS Response: The last successful check-in with Cablecast Cloud Services.
- Last AWS Token Generation: The last time an AWS token was generated for use by certain Cablecast Cloud Services.
Reconfiguring API connection will present you for your Token ID and Token Secret. This only needs to be done once, or if you regenerated new tokens. It's recommended not to share your token ID and secret as shared access could incur unauthorized charges.
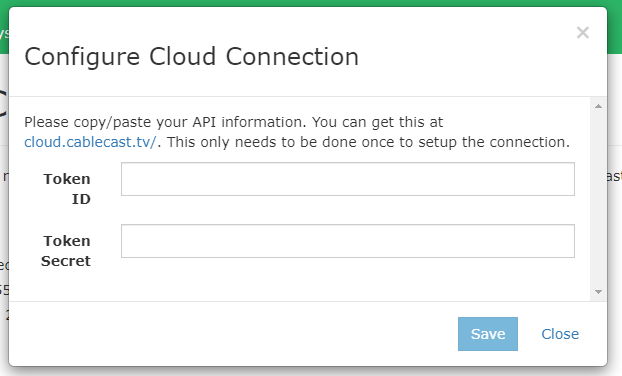
To configure / reconfigure API access:
- Generate tokens on cloud.cablecast.tv or with support
- Copy & paste your token ID
- Copy & paste your token secret
- Click
Save
The rest of the screen displays whether any of the optional Cablecast services are enabled. Click on the FIND OUT MORE link on each service to be directed to the Cablecast web site.
License Info
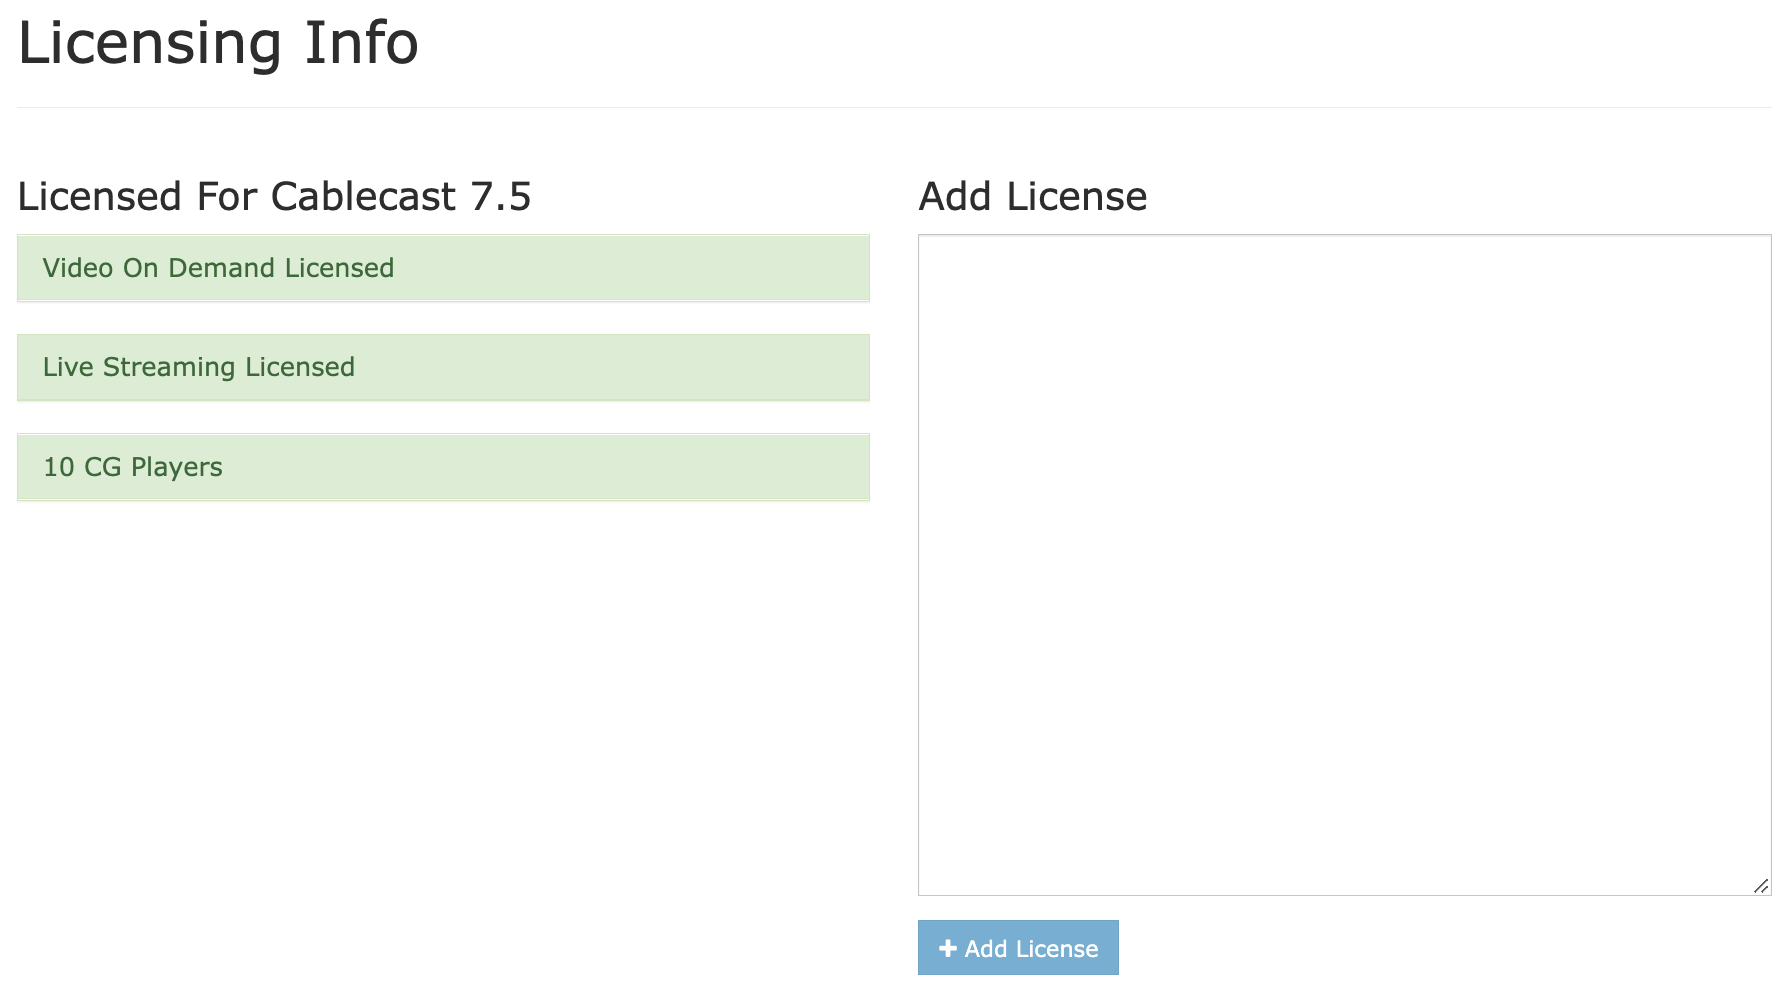
This is where you can see the license information for your Cablecast system, and the ability to change licensing if desired.
- Current License:
- The highest Cablecast version your licensed for (Example: Cablecast 7.5)
- Feature sets included in license
- Number of CG players licensed. (Example: 4 CG Players)
Software Updates
Cablecast has a system to manage the automatic download and installation of Cablecast software updates. The update process has three phases:
- Notification: Cablecast will present a notification when a new version of the software is available for the system.
- Download: Downloading an update will retrieve the installation files from the cloud and distribute them to all Cablecast servers in the system.
- Installation: Once the installers are downloaded they can be run either manually or automatically.
Update Notification

If an update is available, the following information is available:
- Version Number: The version number of the update available to you.
- Release Channel: Typically this will show "Release" unless you are a beta user.
- Summary: A summary of the update.
- Details Button: View more about the update, and options for download.
Clicking on the Details button will present a window showing more information about that update including the version, release channel, release date, and more detailed release notes for that version. A button will be available to initiate the download of the installers.
Download Update
When ready to begin the updating of the Cablecast system, click the "Download" button. This will initiate the process of pulling down the installer file to the primary Cablecast server. Once that download is completed it will be distributed to all of the other servers on the system.
You'll be able to watch the progress of the update until it reaches 100%. You may continue to use your system while the update downloads. The installer files will be copied to the C:/TRMS/CablecastInstallers folder on each server. After the installers are distributed, a button will be available that can be used to automatically run the installers on all of the systems.

Install Update
Once the installers are available on all of the Cablecast system, the user can choose whether to manually run the installers or let Cablecast automatically do the installs.
If it is preferred to run the installers manually, proceed to each server and access the installers in the C:/TRMS/CablecastInstallers folder. Use Windows to remove the current Cablecast installation. Then launch the installer and let it proceed.
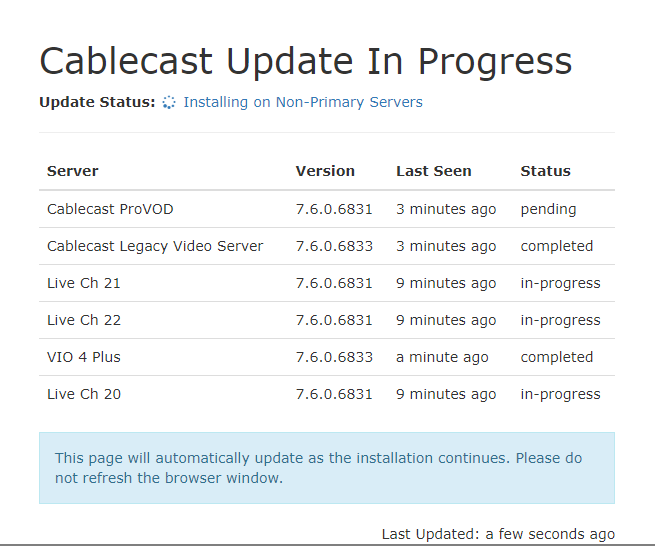
If it is preferred to have Cablecast automatically run the installers on each server, click the "Install" button. This will first run the installer on all of the non-primary servers. Once they all complete the installer will be run on the primary server. While the installers are running video server playback, recording, and live streams will briefly be interrupted.
During the automated installation process interaction with the Cablecast user interface will be locked out. A screen showing the update progress on each server will be presented.
Once the installers have completed on all of the secondary servers and then finished on the primary server the screen will indicate a successful update. Click the "Dismiss" button to acknowledge the update completion and return to the Cablecast user interface.
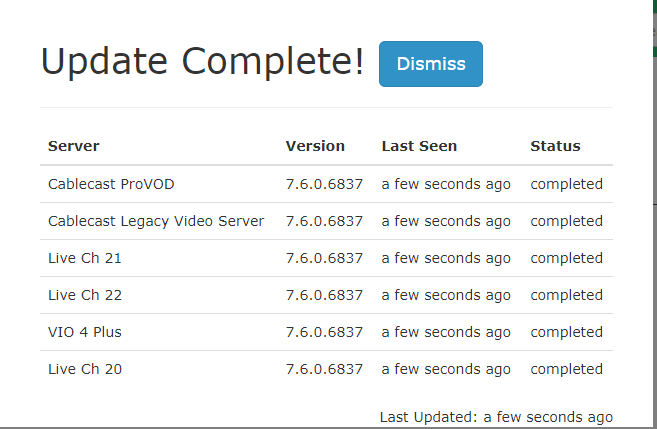
A successful installation on all of the servers in the system can be verified by navigating to the "Servers" section in the "System Settings". The currently installed Cablecast version will be displayed for each server.
If there are any issues or errors reported during the download or installation process please contact Cablecast Customer Support by email at support@cablecast.tv.
Monitoring
Server Jobs
This screen shows you the previous 50 server jobs performed on your Cablecast system(s). A server job is a series of actions performed on the backend for various different operations, such as generating captions, completing system archive backups, or sending files to Cablecast Cloud Services. This screen allows insight into those server jobs to help with troubleshooting, and system health. If this screen is showing errors or failures, ensure the corresponding configuration for that Job Type is correct. Otherwise contact support for assistance.
The list of jobs will show the following information at a glance (clicking on a job number will show more details):
- Job Number: Jobs increment with each new job. This shows the corresponding job number. Clicking this will go into more details.
- Job Type: What type of job was.
- Status: The status of the job. Various value are Pending, Processing, Success, and Failure.
- Server: Which server in your cablecast ecosystem this job belongs to.
- Started: The date / time the job started processing.
- Completed: The date / time the job completed.
Clicking on the job shows additional information. The additional information includes:
- Client Data: The client data associated with the job.
- Created: The date / time the job was created for processing. This is not the date / time it was started for processing.
- Job Data: The job data associated with the job.
- Job Result: The result of a completed (or failed) job.